Build Lightning Piggy p1
Step-by-step guide to building the LCD touchscreen edition Lightning Piggy
Latest Version: This guide is for Lightning Piggy p1, the recommended version with LCD touchscreen and MicroPythonOS.
For Lightning Piggy Classic click here.
Making your very own Lightning Piggy is squealy easy. Here are the steps you need to follow:
- Source the parts.
- Create a wallet.
- Flash the firmware.
- Connect to wifi and configure your piggy.
- Make a case and assemble the parts.
⚠️ IMPORTANT: This is not a toy. It contains small parts which could be a choking and ingestion hazard. There are also sharp edges. It should not be handled by children under 4 years of age. Assembly and use of this product is at your own risk. We take no responsibility for any losses that may be incurred.
Quick Start Guide
If you already have the single board computer, follow these steps:
-
Choose a wallet that supports Nostr Wallet Connect (NWC).
- For beginners: We recommend Coinos - it’s simple and custodial (with the option to auto-withdraw to cold storage), so you can get started quickly.
- For a non-custodial setup: We recommend LNbits or Alby Hub - both support multiple friends and family accounts and are easy to use.
Once your wallet is set up, copy your Lightning Address and NWC link.
-
Flash the firmware using the MicroPythonOS web installer. You’ll need a Wi-Fi enabled computer with Chrome, Brave, Opera, or Edge browser.
-
Connect to Wi-Fi, install the Lightning Piggy app from the MicroPytonOS AppStore, then configure your NWC credentials in Settings. You can turn your credentials into scannable QR codes with our QR code generation tools.
💡 Tip: To improve QR code detection when scanning, zoom in on the code in your browser to make it as large and clear as possible.
Full Guide
1. Source the parts
Single Board Computer (SBC): WaveShare ESP32-S3-Touch with a 2inch screen - including the optional camera makes setup a breeze. Available direct from WaveShare or from resellers.
Case: One homemade case using materials of your choice.
USB-C data cable: Available cheaply for bulk purchases from Aliexpress or Amazon if you don’t have one lying around.
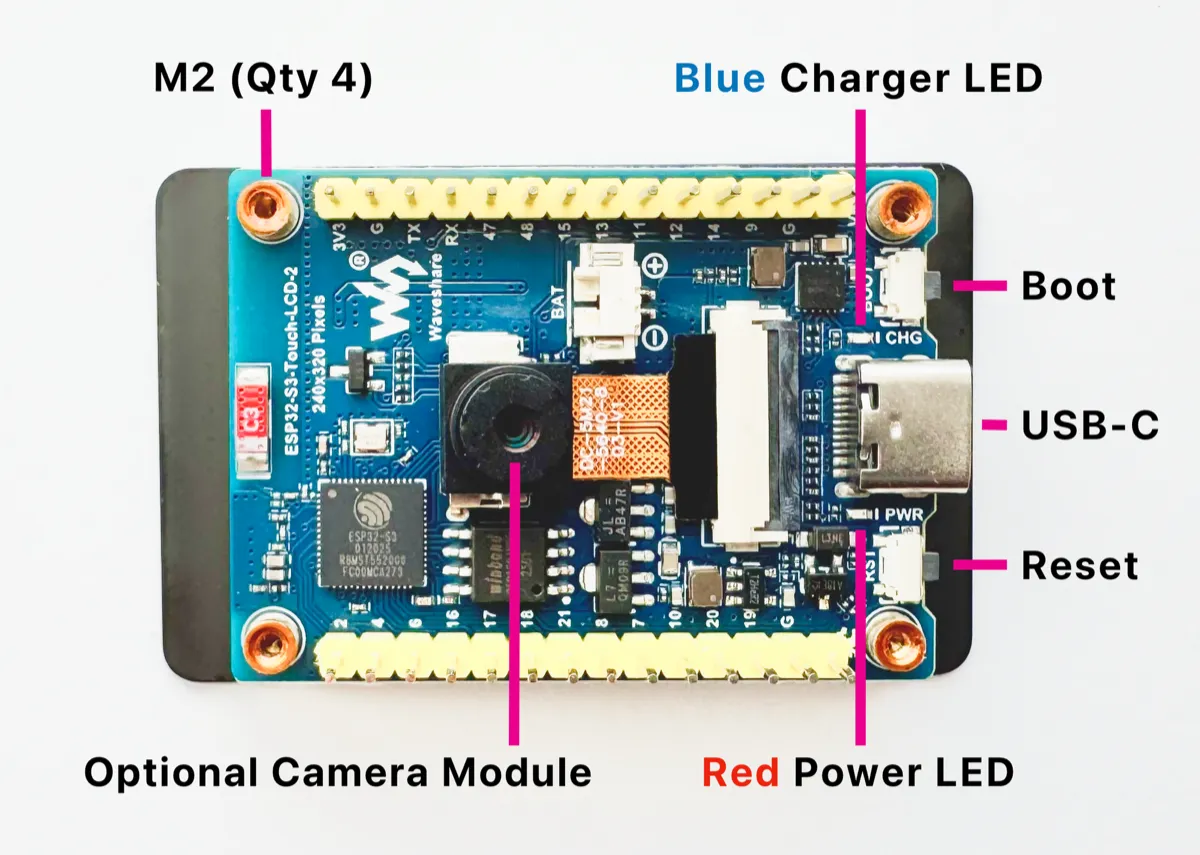 ESP32-S3-Touch with a 2inch screen
2. Create a Wallet
You have two options for connecting your piggy:
- NWC (Nostr Wallet Connect) - A protocol that lets you securely link your Bitcoin wallet to applications without exposing your private keys. Simple and safe.
- LNBits - A versatile wallet and payment processing system for the Lightning Network, offering more control and customisation.
Below is a detailed comparison:
| Feature | NWC | LNBits |
|---|---|---|
| Purpose | Protocol for connecting Lightning wallets to apps via Nostr | Multi-wallet Lightning account system |
| Prerequisites | No server required, just a NWC-compatible wallet | Requires hosting a server or using a hosted instance |
| Ease of Use | Easy! Copy and paste NWC link | Requires LNBits instance setup |
| Custodianship | Non-custodial and custodial options | Non-custodial (self-hosted) or custodial |
| Wallet Support | Any NWC-enabled wallet | Internal + NWC via extension |
| Best For | Simple wallet connection | Self-hosted, multiple accounts, extensions |
Nostr Wallet Connect
Choose an NWC-enabled wallet and follow the provider’s setup instructions. Here are some popular options:
| Wallet | Description |
|---|---|
| Alby Hub | Self-custodial, open-source lightning wallet that connects to apps |
| Cashu | Free, open-source Bitcoin wallet that uses ecash |
| Coinos | Free custodial web wallet and payment page |
| Primal | Popular nostr client with integrated custodial wallet |
| Zeus | Self-custodial, open-source Bitcoin wallet |
Go to the NWC information page in your chosen wallet (usually found in the settings). Locate and copy the NWC link, which should follow this structure:
nostr+walletconnect://f3a192b445cd7e8f2d4a60c578eb932a57b83d9265fa790042bd865937c2e5d9?relay=wss%3A%2F%2Frelay.example.com&secret=11d4fc982746ab5389f75efc3ddaa94761e35fb209ec8d7a4b3d248ac4e6f710&lud16=RandomWallet@domain.comKeep a record of your wallet’s Lightning address (which resembles an email address), as it will be used to receive bitcoin payments over the lightning network. This address will be automatically converted into a QR code and displayed on the Piggy’s screen for easy scanning.
LNbits
If you wish to run a LNbits wallet, please refer to our detailed guide for step-by-step instructions.
3. Flash the Firmware
You’ll need a Wi-Fi enabled laptop/desktop computer, a browser that supports the Web Serial API (such as Google Chrome, Brave, Opera, or Microsoft Edge), and your configuration details ready.
The Lightning Piggy MPOS app runs on MicroPythonOS - a lightweight, fast, and versatile operating system designed for both microcontrollers and desktop systems.
MicroPythonOS was created by Thomas, our lead developer, during the development of Lightning Piggy. It grew out of a need for a fast, flexible, learner-friendly OS tailored to microcontrollers.
Flash MicroPythonOS to your device using this web installer.
💡 Tip: To improve QR code detection, zoom in on the code in your browser to make it as large and clear as possible.
4. Connect to Wi-Fi and Configure Your Piggy
Connect your device to a 2.4 GHz Wi-Fi network using the Wi-Fi app, then open the App Store and install the Lightning Piggy app. Next, you’ll need your wallet’s NWC or LNbits credentials - ideally as a QR code for quick entry via the onboard camera.
| Connection | Required Credentials |
|---|---|
| NWC | NWC link (e.g., nostr+walletconnect://...), Lightning address |
| or LNbits | Server name (e.g., https://my.lnbits.com/), Invoice/read key |
Now to configure your wallet. In the Lightning Piggy app, tap the settings cog and select your wallet type (NWC or LNbits), then scan your credentials QR code using the built-in camera - or enter them manually via the keyboard if you prefer (though this requires some patience).
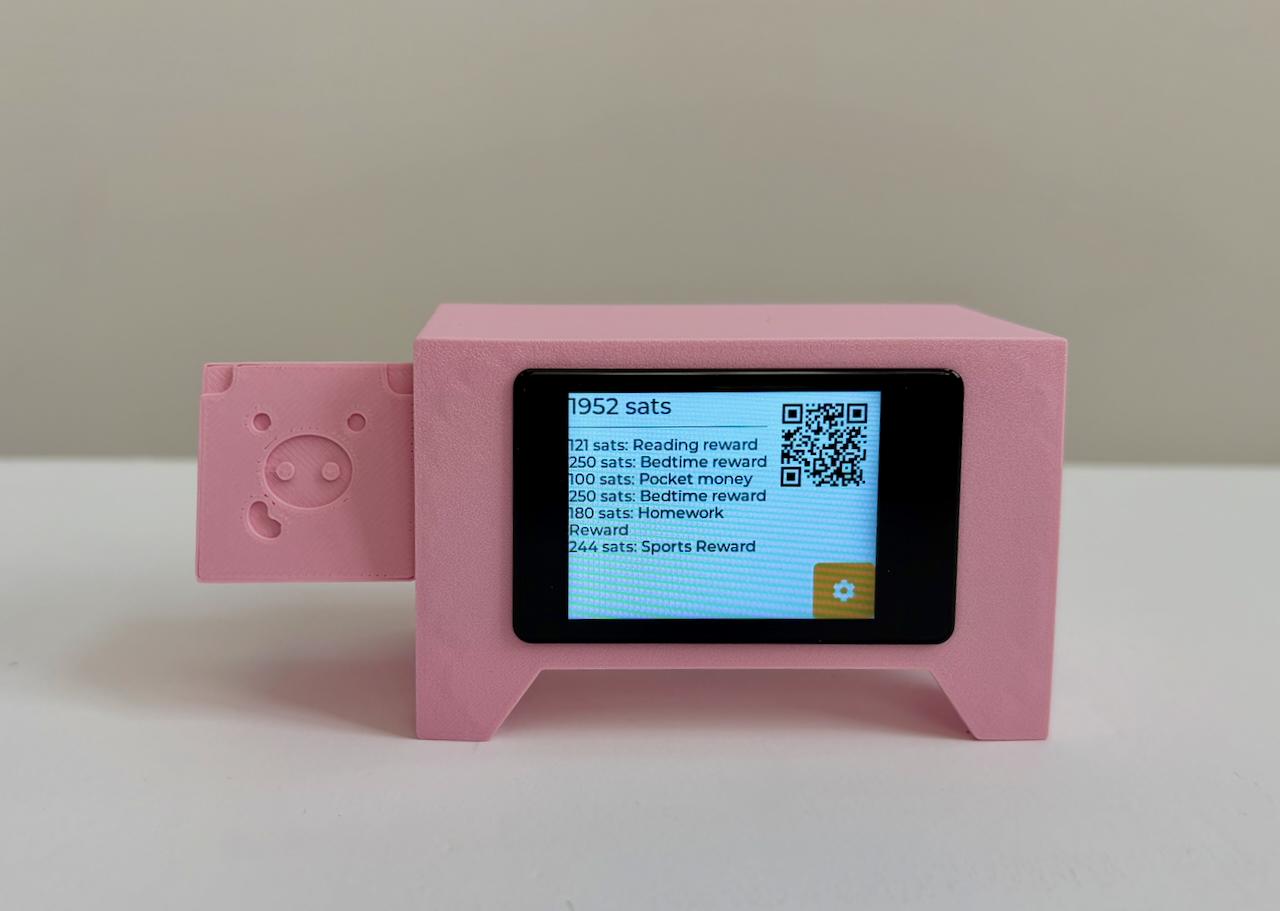
Once saved, your device will connect to your wallet and update the screen to show your balance, recent transactions, and payment QR code. This typically takes about a minute.
📸 QR scanning tips:
- Make the QR as large as possible - aim for 4-12cm (about 1.5-4.7in) on the source screen or print.
- Scan distance - hold the piggy around 10-25cm (about 4-10in) from the QR code.
- Hold still - small wobbles can confuse the scanner.
- Black on white only - the QR needs to be dark on a light background. Inverted QRs (for example, those shown on a device in dark mode) won’t scan.
5. Make a Case and Assemble the Parts
Time to get creative! Build your very own Lightning Piggy case out of any material you wish to use, and assemble the parts.
Check out our case options.
If you would like to share your design with others, please either email your creation to oink@lightningpiggy.com, or post a note on nostr with a photo of your piggy, including the hashtag #zapmypiggy for inclusion on this website.
Join our telegram chat for help or inspiration, or to share your work with other Lightning Piggy builders.